Creating Products
To create products, start on the Create Products page.
On the left side of the page, fill out the tab pages 1-4 to create your products. On the right side of the page, see what the product description might look like, the replaceable description field parameters, and the details about each product.

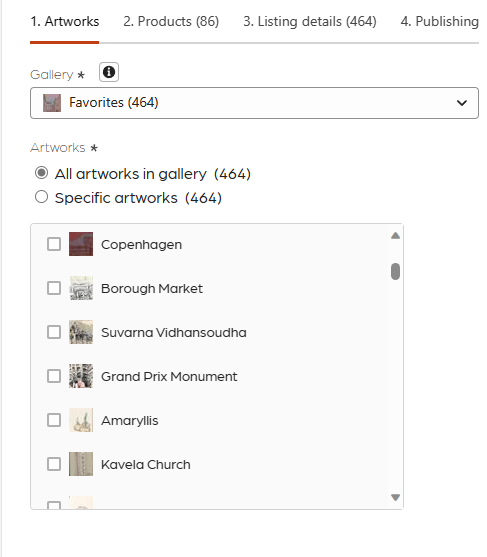
- Artworks
- Make sure that your have the highest possible resolution images for your artwork in Lightroom. Consider enhancing your photos using super resolution to do this. If you do this, update your gallery to have the .DNG enhanced files in the gallery album.
- Select any of your public or unlisted galleries.
- Select either all the artworks in your gallery or specific artworks. When you select specific artworks, the product list will updated based on the resolution and aspect ratio requirements of each product. When you select multiple artworks, the products shown will work for all of the artworks based on the resolution and aspect ratio of the artworks.
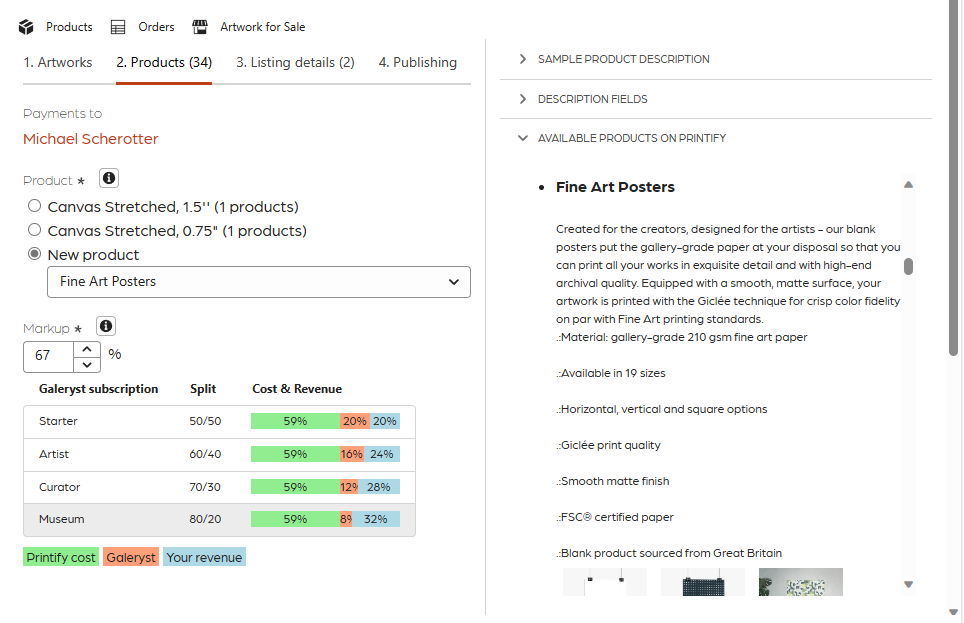
- Products
- Select a product. Most of the products have detailed descriptions listed on the right of the page. You can see the cost for products on the Printify site.
- If you want to earn revenue selling your products in the Galeryst shop, you will need to setup payment processing. Click on the link to setup a payment account with Stripe.
- Select a markup percentage that will be applied to the product cost. You can see in the revenue breakdown chart how much revenue you can earn from sales of the products.
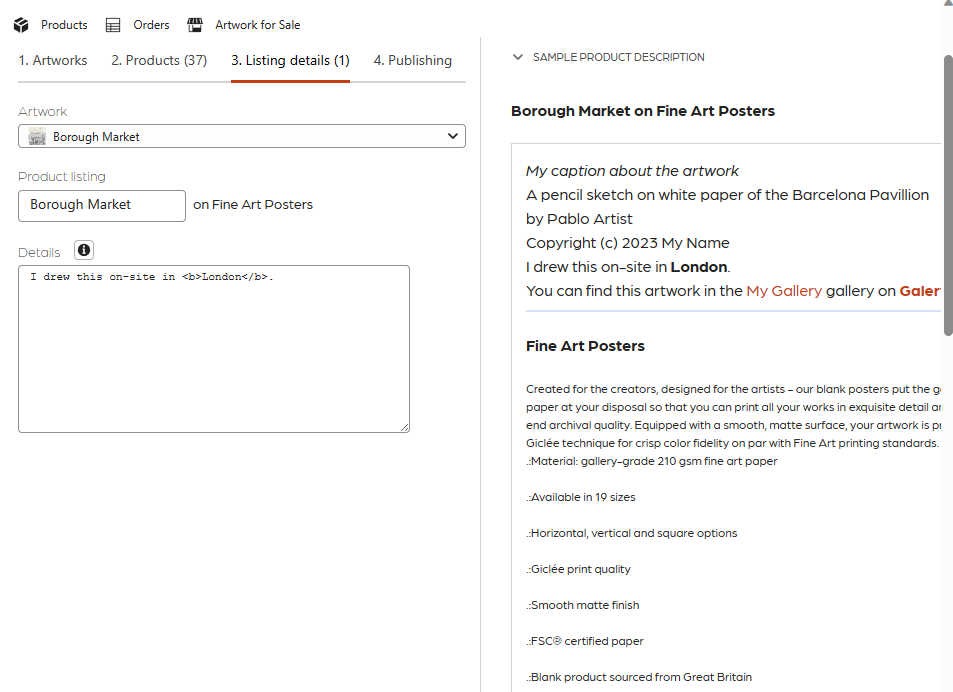
- Listing detailsThe name of each product will be the title in Lightroom ' on ' the name of the product. So for an artork titled 'Forge' printed on 'Acrylic Prints', the product title will be 'Forge on Acrylic Prints'. You can change the name after the products are published.
- If you want to change the listing name of a specific artwork product, select the artwork and then update the product listing name.
- If you want to add additional text for a product, add it to the details. You can enter either plain text or HTML. Only include content it the details relevant to the artwork or artist.
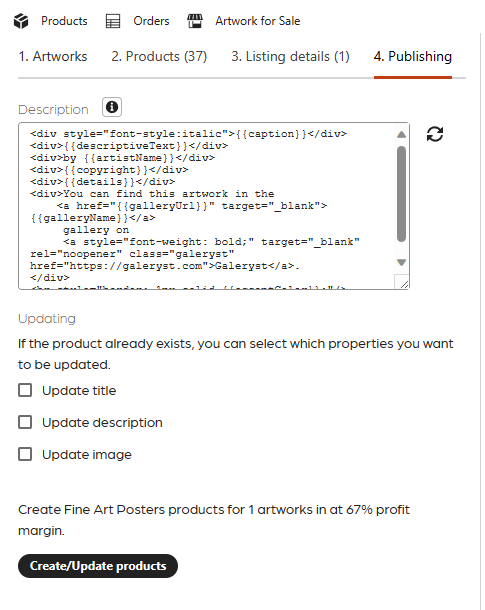
- Publishing
- Update the description template HTML with parameters that are taken from Lightroom or Galeryst. Look at the Description Fields section at the top of the printing page to see all of the fields. You can see how the description will look in the Sample Description section on the right side. This content will appear in each product description.
- Press the Create/Update Products button and the products will be created on Printify and published to the Galeryst Shop. Note that subsequent runs of this for the same products will update the existing products. Use the update options to control what gets update.
- In a minute you will be able to see a list of your products on the Galeryst Products page with their listing prices and links to the items in the Galeryst Shop. You can also control their visibility in the Store on the products page.
- You can update any of the aspects of your products at any time, including the markup, name, and description.
- If the products are visible in the store, then they will be visible in your gallery as well in a list below the Foyer image on the main gallery page. In addition, each product will be visible with a hang tag to the right of the artwork or below the artwork card. Clicking on the hang tag will take the visitor directly to the store page for the product.
- Revene based on your subscription level will be distributed to you on a monthly basis using the payment processing account that you setup in the Markup step above.