Host live gallery shows in Microsoft Teams with 3D avatars representing the host and guests.

An art gallery with a dinosaur on the left and female avatar on the right.

This functionality is currently in 'Beta Testing' and you may experience issues. Please report any issues here.

Known Issues

  1. This currently only works from Microsoft Teams work and school accounts. If you do not login to Teams with a work or school account, the gallery show will not work. This is an issue currently being addressed by Microsoft.

Gallery Show Installation

Microsoft Teams

Microsoft Teams is a business communcations platform that supports calling, video conferencing, and workspace chat. Gallery Show is a free Microsoft Teams app built to enable hosted gallery shows for galleries on Galeryst.

Installing the Gallery Show app

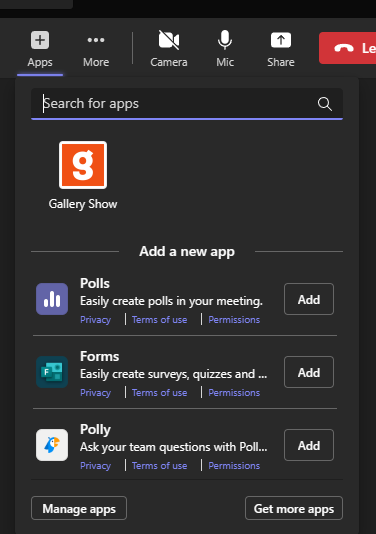
The Gallery Show app is delivered as a .zip package that can be distributed and installed in various ways:

  • Installed by the Microsoft Teams administrator for an organization.
  • Installed from the Microsoft Teams Apps catalog (not available yet).
  • 'Sideloaded' for a specific Teams meeting.

'Sideloading' Gallery Show for a Microsft Teams Meeting

  1. Download the Gallery Show Teams app to your computer (named Gallery Show.zip).
  2. Start a meeting in Microsoft Teams
  3. In the meeting top toolbar, click on the Apps button.
  4. In the Apps dialog, click on the Manage apps button in the bottom left corner.
  5. The Manage apps page will display. In the lower right, click on the link to Upload a custom app. If you do not see the link, then your Teams administrator has not enabled users to install apps. Search for 'Gallery Show' in the app list instead.
  6. Select the Gallery Show.zip file that you downloaded in step 1.
  7. A dialog will display showing details about the Gallery Show app from Scherotter Enterprises LLC. Click on the Add button in the lower right.
  8. Go back to the meeting in progress to activate the Gallery Show tab in the meeting.

Activating Gallery Show in a Meeting

  1. In the meeting top toolbar, click on the Apps button again and you will see the Gallery Show app listed. If you don't see it listed, search for 'Gallery Show'.
    Adding Gallery Show to a Teams Meeting
  2. Click on the Gallery Show app.
  3. You will see the a dialog telling about the Gallery Show app. Press the Save button when it becomes enabled.
  4. Gallery Show is now installed for this meeting. A new Gallery Show g tab icon will appear in the Teams meeting.
  5. Press the button and the Gallery Show sidebar should display listing the featured galleries on Galeryst.
    Gallery Show Teams button
Gallery Show sidebar

Hosting a meeting

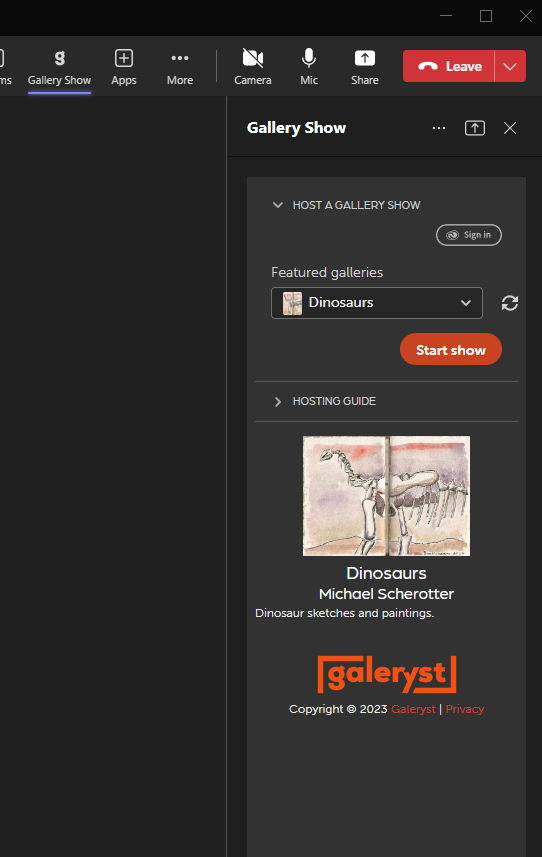
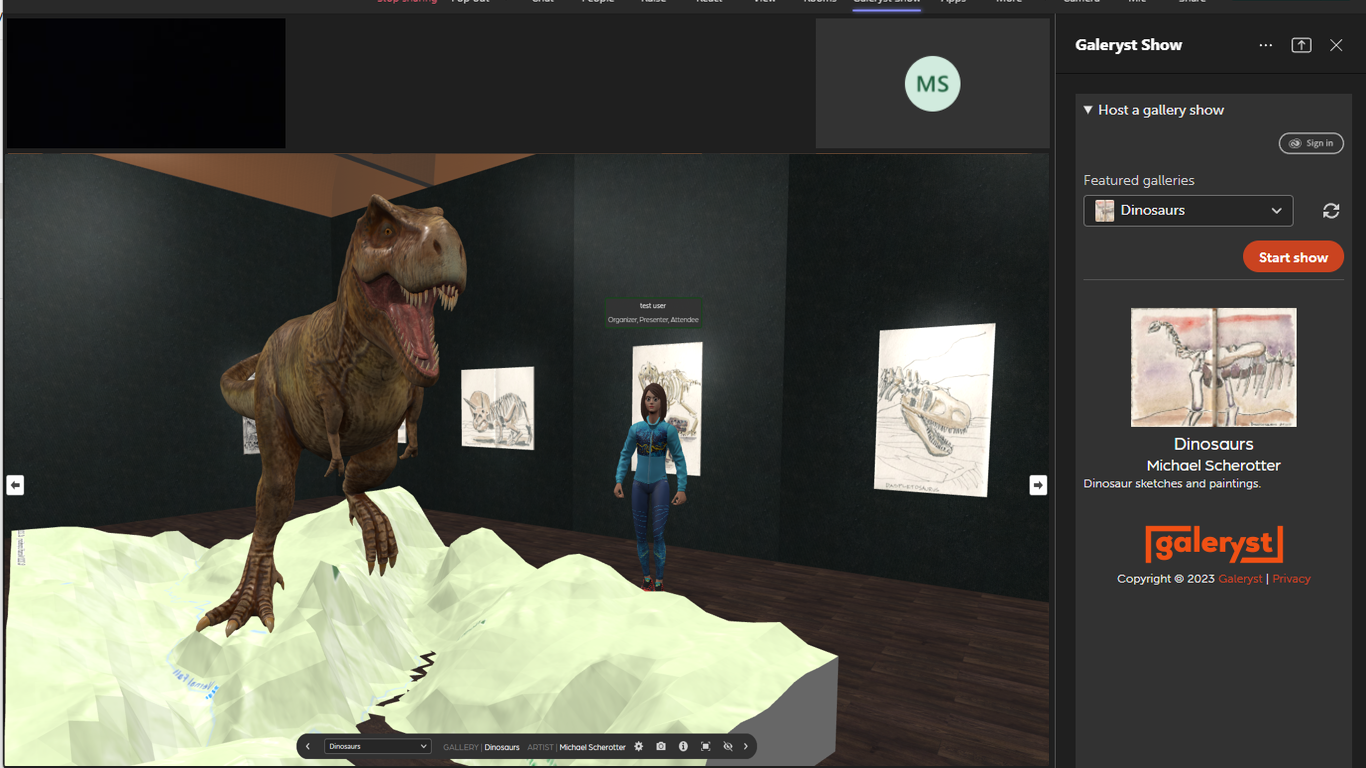
By default, the Featured Galleries for Galeryst are available for anyone start a show. If you want to start a show with your gallery, and it isn't featured, you will need to sign in with your Adobe ID. Once you do that, you will see your public and unlisted galleries in the gallery drop-down. Select a gallery in the gallery list and press the Start show button in the Gallery Show pane, and you will start showing the selected gallery as the host. Start show

In a few seconds, each meeting participant will see a their Teams main view activate and a dialog for Galeryst will appear there for users toconfigure their presense before they enter the gallery. Users will have an option to select or create an avatar to represent themselvesas they move around the gallery.As soon as you press the Enter gallery button, you will enter the foyer with your back to the panel with the gallery title and wings on it, facing all of the visitors.

When the host enters the gallery, they will see a collapsible pane that shows information about the gallery show.

Hosting pane
  • The number of visitors who are following the host as a docent are shown below Host.
  • The Gallery Guests section shows the number of guests in each wing of the gallery and in the foyer.
  • The Whiteboard section lets the host show the whiteboard when selecting an artwork, and can optionally enable guests to draw on the whiteboard as well.

Your Presence in the gallery show

Gallery Show dialog

Before you enter a gallery show, you need to set certain aspects of your presence - how the host and other visitors will see you in the gallery. You will be represented by an avatar with your name specified above your head in a rectangle. Your avatar will be either a basic geometric solid shape with an emoji or an image you upload as a face or a custom avatar from Ready Player Me that you create. When you enter the gallery in the foyer you will see two mirrors in the room's corners that you can use to see what your avatar looks like to other guests. If you want to modify your presence or learn about navigating, click on the Gallery Show presence button Gallery Show presence button in the upper right corner of the gallery screen to show the dialog again.

  • Name: the name that appears above your avatar.
  • Color: the color of the border around your name and the color of your basic avatar (if you choose one).
  • Avatar: they type of avatar
  • Enable host docent toast notifications: show notifications when the host moves between wings, selects artwork, or opens a whiteboard.
  • Share visit data with the artist: This will share anonymous visitor data with the creator of the gallery including where you are visiting from and what artwork you look at when visiting the gallery.

Notifications

Docent Host Notifications

When the gallery host moves from one wing to another in a gallery, touches an artwork, or opens a whiteboard at an artwork, visitors are notified with a 'toast' and are given an option to join the host. If the user unchecks the option Enable host docent toast notifications on the Presence tab, they will not get these notification messages.

Following another visitor

If you click on another visitor's avatar, you will see a menu option to Follow user. If you select this option, you will get notified with a toast when the visitor touches an artwork so you can follow the visitor around the gallery during the show.

Click on the same visitor again to stop following that visitor.

Avatars

The avatar will represent your presence in the gallery show and you can customize it at any time. Two mirrors are in the foyer so you can see what you look like to others in the gallery.

Basic Avatars

The basic avatars are avatars made from simple geometric shapes where you can choose the shape, the color, and the face (an emoji) or an image.

Basic avatar editor

Ready Player Me Avatars

You can create, customize, and save a human-like custom avatar using Ready Player Me.

  • If you are using your camera in Teams, you should not select the camera option to create an avatar.
  • You do not need to create an account to proceed, that is optional.
Ready Player Me avatar editor

The Whiteboard

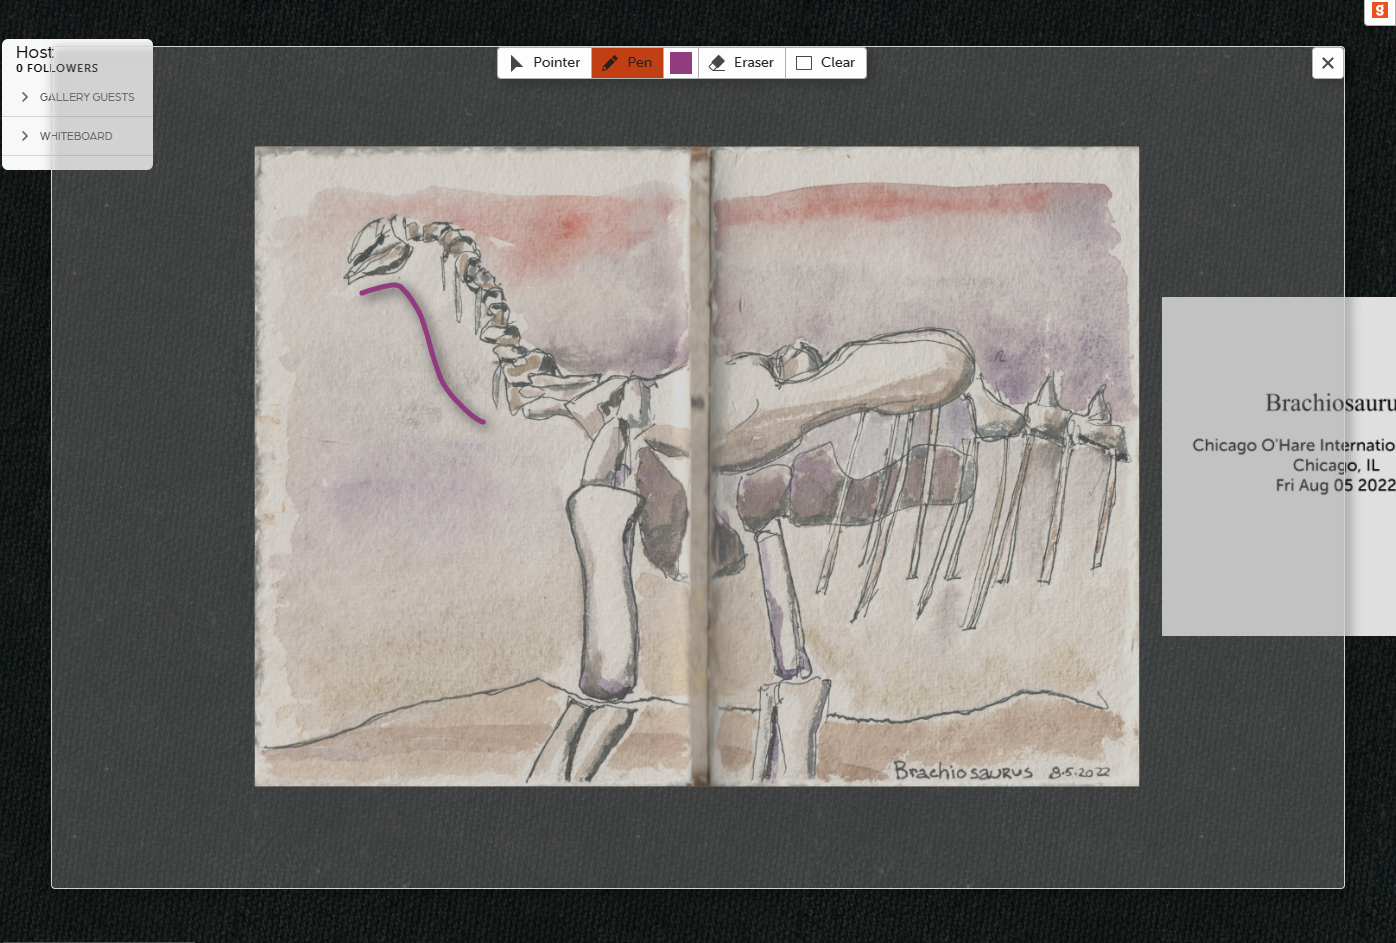
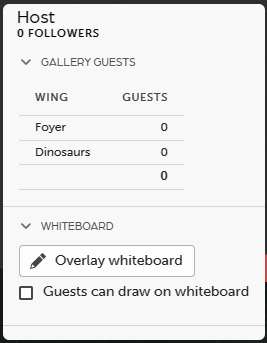
The host can open an whiteboard and start drawing on it in front of anything in the gallery. The whiteboard is by-default read-only for visitors, but in the hosting tools, the host can enable visitors to draw on it as well. When opened by the host, visitors who have enabled host docent notifications will be notified and can move to the artwork in context.

whiteboard
  • Pointer: use a laser pointer with a temporary trail. The color of your laser pointer is the avatar color you selected before entering the gallery. Click on the [g] button in the upper right to change it.
  • Pen: draw with a pen
  • Line: draw straight lines
  • Arrow: draw lines with arrows at the end
  • Color: select the color used for the pen, line, and arrow.
  • Erase: erase individual marks on the whiteboard.
  • Clear: clear the whiteboard
  • Save: Download the whiteboard with an image of whatever it is in front of as a .png file.